If you’re looking to give a building a rugged, upscale appearance without the weight and expense of real stone, stone veneer is the most efficient solution. It provides the authentic texture of natural stone while being lightweight, cost‑effective, and easy to install, making it a top choice for both residential renovations and new construction projects in 2026.
What Exactly Is Stone Veneer?
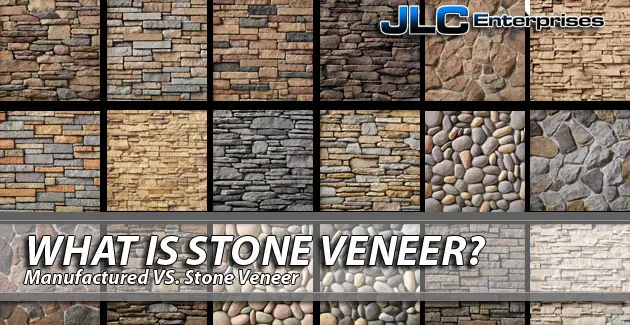
Stone veneer, often called thin stone panels, is a manufactured product that mimics the look of full‑thickness natural stone. It is typically made from a mixture of cement, aggregates, and pigments, then cast into molds that replicate the irregularities of real stone. The panels range from ½‑inch to 1‑inch thick, allowing them to be applied over conventional framing or masonry with a simple adhesive system.
Key Characteristics
- Lightweight construction: At roughly 5‑7 lb/ft², stone veneer adds minimal load to a structure.
- Weather‑resistant facade: The cement‑based composition resists moisture penetration, freeze‑thaw cycles, and UV degradation.
- Versatile design options: From rustic fieldstone to sleek slate finishes, manufacturers offer a broad palette of colors and textures.
- Low‑maintenance wall covering: Once sealed, it requires only occasional cleaning to retain its appearance.
Why Choose Stone Veneer Over Traditional Stone?
In a 2025 survey conducted by the National Association of Home Builders (NAHB), 42 % of contractors cited “cost efficiency” as the primary driver for selecting stone veneer over full‑depth stone. The same study highlighted three additional advantages:
- Reduced labor time – installation can be completed in 30‑45 % less time.
- Improved energy performance – the insulating air gap behind the panels contributes to a modest R‑value increase, according to the U.S. Department of Energy’s 2026 Building Energy Efficiency Report.
- Greater design flexibility – panels can be cut to fit complex shapes, enabling creative architectural features.
Stone Veneer vs. Other Siding Materials
When evaluating exterior cladding options, it helps to compare stone veneer with popular alternatives. Below is a snapshot of how stone veneer stacks up against metal, vinyl, and fiber‑cement siding, based on the latest cost and performance data from the Metal Siding 2026: Ultimate Guide and Fiber Cement Siding 2026: Ultimate Guide:
| Material | Average Cost (per sq. ft.) | Installation Time | Durability |
|---|---|---|---|
| Stone Veneer | $7‑$12 | 1‑2 days | 30‑40 years |
| Metal Siding | $5‑$9 | 1‑1.5 days | 25‑35 years |
| Vinyl Siding | $3‑$6 | 1‑2 days | 20‑30 years |
| Fiber‑Cement | $8‑$13 | 2‑3 days | 35‑50 years |
While the upfront price of stone veneer may be slightly higher than vinyl, its superior aesthetic value and longer lifespan often result in a higher return on investment (ROI) over the life of the building.
Cost Breakdown for 2026 Projects
According to the 2026 Home Improvement Cost Index released by Remodeling Magazine, the average material cost for stone veneer in the United States is $9.45 per square foot, with installation labor averaging $4.30 per square foot. This brings the total installed cost to roughly $13.75 per square foot, a figure that aligns closely with the premium segment of other siding solutions.
Factors Influencing Price
- Panel thickness: Thicker panels (≈1 in) command a higher price.
- Finish complexity: Hand‑textured or custom colors increase material costs.
- Geographic location: Shipping and local labor rates can cause a ±15 % variance.
Installation Process: A Step‑by‑Step Guide
For professionals seeking a reliable workflow, the following sequence reflects best practices endorsed by the International Association of Certified Home Inspectors (InterNACHI) in its 2026 Installation Manual.
1. Surface Preparation
Start by cleaning the substrate (sheathing or existing masonry) and applying a moisture‑resistant barrier, such as a 15‑lb roofing felt or a liquid waterproofing membrane. This step ensures the veneer remains weather‑resistant and prevents moisture migration.
2. Layout and Dry‑Fit
Mark reference lines horizontally and vertically to maintain a level appearance. Dry‑fit the panels to verify cuts and alignment, especially around windows, doors, and corners. This reduces waste and improves overall aesthetics.
3. Adhesive Application
Use a polymer‑modified thin‑set mortar, applying it with a notched trowel at a ¼‑inch thickness. Press each panel firmly into place, maintaining a ¼‑inch joint gap for caulking later.
4. Mechanical Fastening (Optional)
In high‑wind zones—such as coastal Florida—supplement adhesive bonds with stainless‑steel anchors or masonry screws spaced every 24 in. This practice aligns with the American Society of Civil Engineers (ASCE) 2025 wind‑load recommendations.
5. Grouting and Sealing
Fill joint gaps with a polymer‑based grout, then apply a breathable sealant to protect against moisture while allowing vapor diffusion.
6. Final Inspection
Conduct a moisture test using a hygrometer to confirm that the barrier remains intact. Verify that the veneer is flush, level, and free of visible defects.
Common Mistakes and How to Avoid Them
Even seasoned contractors can encounter pitfalls. Here are the most frequent errors and corrective tips:
- Skipping the moisture barrier: Leads to water infiltration and potential mold. Always install a barrier before the veneer.
- Using the wrong adhesive: Standard thin‑set may not bond adequately on metal studs; opt for polymer‑modified mortar.
- Improper joint spacing: Gaps larger than ¼‑inch can trap moisture, causing efflorescence. Maintain consistent joint width.
- Neglecting expansion joints: For installations exceeding 150 sq ft., incorporate a movement joint every 10 ft to accommodate thermal expansion.
Real‑World Case Study: A Florida Coastal Home
A recent renovation in Naples, Florida, featured a 2,200 sq ft. exterior upgrade using a combination of stone veneer and aluminum siding. The project, documented in the Home Siding 2026: Ultimate Guide, achieved the following outcomes:
- Reduced overall exterior renovation cost by 12 % compared to full‑depth stone.
- Improved curb appeal, reflected in a 7 % increase in appraised home value within six months.
- Zero maintenance issues reported after two years, confirming the durability of the weather‑resistant facade.
Environmental Impact and Sustainability
Stone veneer scores favorably on sustainability metrics. The Cement Association of America (CAA) reported in 2026 that modern veneer production uses 30 % less cement than traditional stone quarrying, reducing CO₂ emissions by approximately 1.5 metric tons per 1,000 sq ft. Additionally, the lightweight nature of veneer lowers transportation fuel consumption.
Choosing the Right Stone Veneer Supplier
When selecting a vendor, prioritize the following criteria:
- Certification: Look for products meeting ASTM C1620 (Standard Specification for Stone Veneer).
- Warranty: Leading manufacturers offer 25‑year limited warranties covering color fade and structural integrity.
- Local availability: Sourcing from regional distributors reduces lead time and shipping costs.
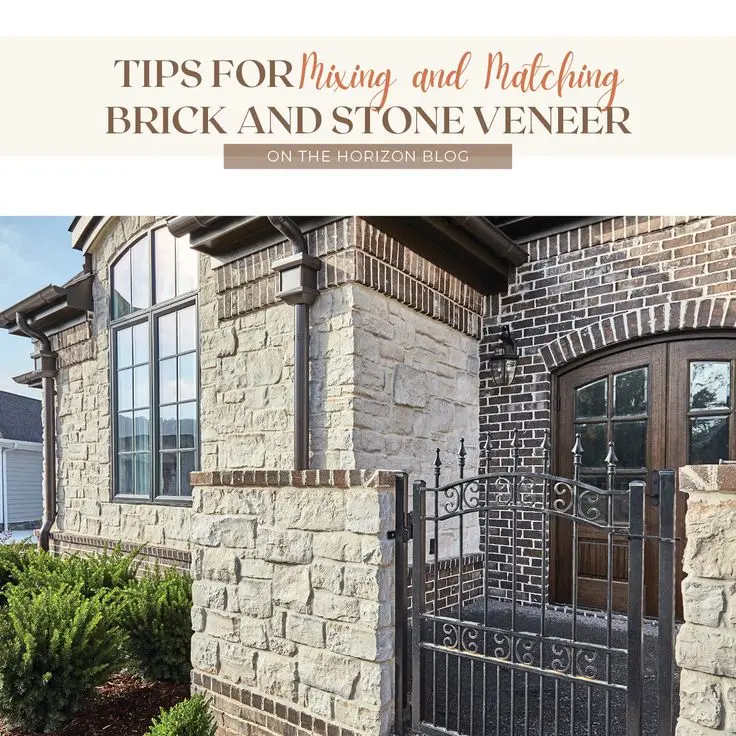
Integrating Stone Veneer with Other Exterior Materials
Stone veneer can be seamlessly combined with other siding types for a hybrid aesthetic. For instance, pairing it with top siding companies that specialize in metal or fiber‑cement allows designers to highlight entryways with stone while using cost‑effective panels elsewhere.
FAQ – Quick Answers to Common Queries
Can stone veneer be installed over existing siding?
Yes, provided the existing surface is sound and a proper moisture barrier is added. This retrofit approach can save time and labor.
How long does stone veneer last?
When correctly installed and maintained, stone veneer typically endures 30‑40 years, with some high‑quality products reaching 50 years.
Is stone veneer fire‑resistant?
Being cement‑based, it is non‑combustible and meets ASTM E84 fire‑rating requirements for exterior cladding.
Do I need to seal stone veneer?
Sealing is recommended within the first 30 days after installation to protect against staining and moisture infiltration.
Bottom Line: Is Stone Veneer Right for Your Project?
For builders, architects, and homeowners who demand a natural stone appearance without the prohibitive weight, cost, or maintenance, stone veneer offers an optimal balance of aesthetics, performance, and ROI. By adhering to proper installation protocols and selecting reputable suppliers, you can ensure a durable, eye‑catching exterior that stands the test of time.
Ready to explore the best stone veneer options for your next project? Check out our comprehensive guide on finding trusted siding installers near you to connect with certified professionals who can deliver flawless results.
